
Watermelons and summer. They just go together, don’t they? I have so many memories of eating ice-cold watermelon, and many of those memories revolve around the beach. My sisters and I would sit with our sandy legs stretched out on warm beach towels and eat slice after slice of watermelon as the ocean roared in the distance.
Summertime also makes me think of filling a tote bag with a good book and a journal and heading out for a mini-retreat for the afternoon. I bought a pack of plain tote bags a few years ago and thought it would be fun to combine my love for watermelon and tote bags into the perfect summer tote. This project is so simple; you could easily whip it up in an afternoon!
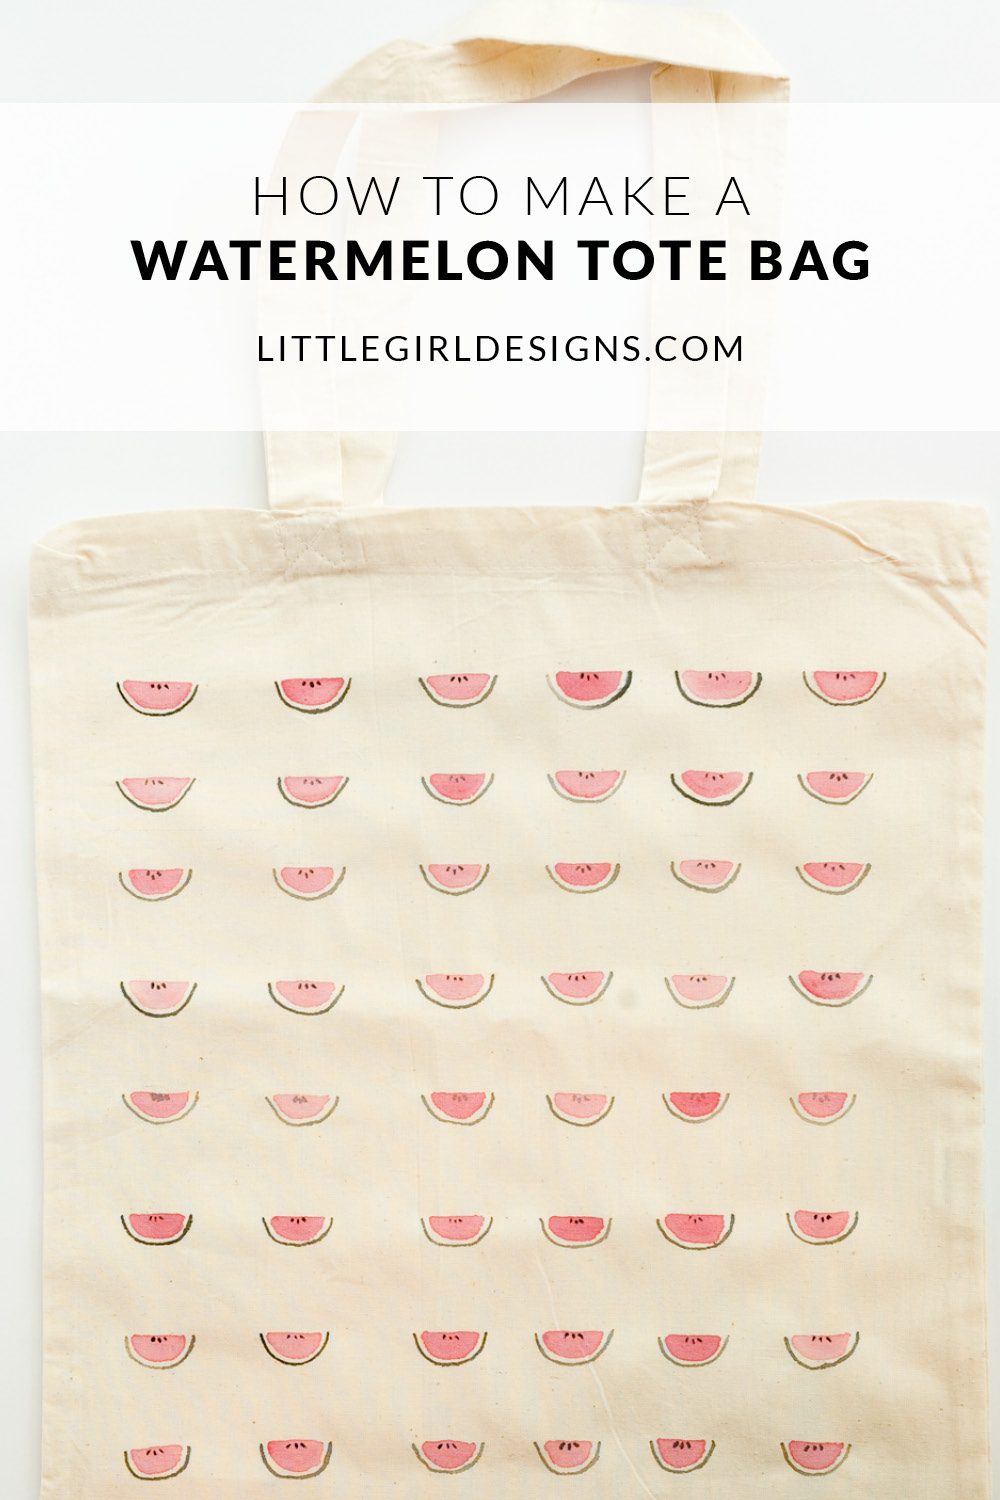
Make a Watermelon Tote Bag
You will need:
One cotton tote bag
Pink fabric paint
Black fabric paint
Paintbrush (Use a small one so you will have more control)
Water
Watercolor paper, for practice
Paper bag or cardboard
Iron the tote bag so it is perfectly smooth. Add a small circle of pink paint to a palette or plate and wet the brush with water. Draw a half circle onto the watercolor paper, and fill it in. This will give you an idea of how watered-down you want to make the paint. For my tote bag, I used a lot of water because I wanted a watercolor effect. Note that the paint will react slightly different on the fabric but that’s okay. The main point of practicing with the paper is to see how light you can go with the paint and to practice drawing the shape.
Place the paper bag or cardboard in the tote bag. This will keep the paint from leaking through to the other side of the tote. I prefer cardboard because it helps make the bag easier to paint. Using the pink paint and working left to right, draw six half circles across the top of the bag. Fill them in with paint as you go. Continue to draw and fill in half circles row by row. For the tote I made, I painted eight rows of watermelon slices. (You may need to paint more half circles or less, depending on the size of your tote.)

Allow the pink paint to dry. Using the tip of your brush, add three dots onto each half circle to represent watermelon seeds. Do not water this paint down as it will bleed. For the watermelon rind, water the black paint down slightly and carefully draw a half circle under the pink design.
This is such a pretty bag to make and would also make a great gift. I had so much fun making this design I decided to make a matching card using the same technique. I’m sure it would also be fun to cover a bag in another design like polka dots or orange slices. I have a feeling a few of my friends are going to be getting tote bags for their birthdays this year!
Have you ever made your own tote bag?
Have a lovely {and creative} day!


5 responses to “How to Make a Watermelon Tote Bag”
This is so super cute, and perfect for summer! I just love that hand-painted look! Those canvas tote bags are so fun to customize!
I agree; aren’t they fun? And I love your site. 🙂 I was nodding my head at your last post about what DIYers have in common. 🙂 love it!
Oh my word, this is too perfect! I need to get my hands on a tote and start painting. Thanks for sharing!
I absolutely love watermelon. It is my favorite Summer time treat. Thanks for the tutorial. I have the perfect canvas makeup bag to try this on.
You’re so welcome, Monique! 🙂 And what a great idea about painting a canvas makeup bag…I need to get some of those! 🙂