
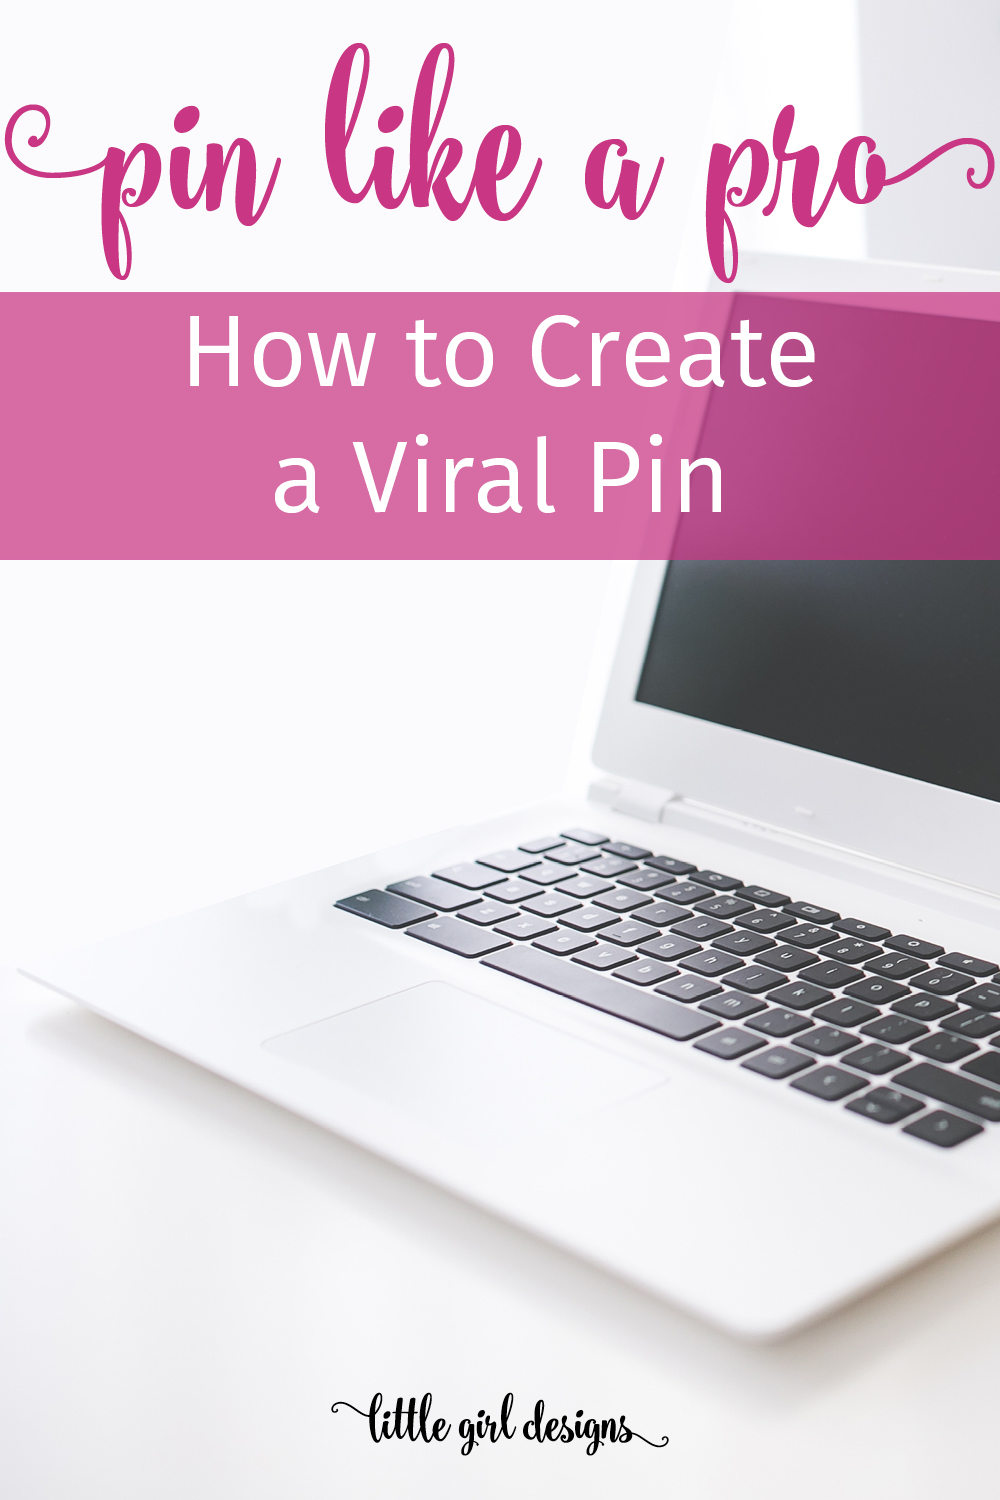
This is the third post in a series about using Pinterest to Pin Like a Pro and in so doing, increase the traffic to your blog and grow your business. We’ll be talking about how to create a viral pin today. You can click here for the first post in the series where I shared how to set up a business account, how to use keywords, and how to make beautiful boards. In our second lesson, I shared via video how to use a pin scheduler to do most of your pinning work for you. You can click here for the second post. They’re both packed with information!
Choose Colors for Your Pins (and Brand)
Today we’re going to be talking about how to create a viral pin. In lesson one, we talked briefly about pinning color themes that were consistent with your brand.
For this exercise, you’re going to need to choose two colors as your main blog colors. If you already have a theme installed that you love, I’d recommend going with that color scheme to keep everything consistent. You can use other colors for fonts and blocks of color on your pins, but you want these two to be your mainstays. Everything else will work as accent colors.
You’ll need to get the hex codes for the colors you’ve chosen for your brand, and write them in your planner or create a document that has them. Below is a screenshot of where the hex code is located. This is important because you want to be choosing the same colors over and over for your Pinterest images rather than guessing your brand colors when creating an image.

Create a file on your computer for your Branding. You can create folders like this: BLOG > {your blog name} Branding > Colors and Fonts
This is what my branding template looks like (though I need to update it since I don’t use Lato anymore as a font. :)) I have this saved as a Photoshop and an InDesign file so I can copy/paste the hex codes whenever I need them.

Now that you have your two main colors picked out, it’s time to choose fonts and learn how to create a beautiful pin that gets clicks.
How to Create a Beautiful (and Viral) Pin
Most of the viral pins on Pinterest have an overlay of cover and a font title that is large and easy to read. The title on these pins is the biggest key to getting clicks. Remember, you want to solve a problem for readers. So when you’re creating a title, think about how you can convey your message in a way that makes readers want to click and learn more.
The only caveat I’ve noticed with the overlays and larger titles are food and craft pictures, as they can tell a story in themselves. You can certainly add one to add an extra punch but as you’ll see with the cake picture example in the picture below, you’ll either be interested in clicking through immediately or not just by the way it looks.
For items that need more explaining such as business advice, printables, etc., you’ll want to create an image that includes text. A couple of things to keep in mind here.
Use two fonts maximum. In the right image you can see that Regina from byRegina.com used one font and used the italics version of it to make the “51 Types” portion stand out. Also note that she used different sizes of the same font.
For my mini book pin, I used two fonts. I typically use a simple font (Fira Sans) as well as a more frilly font (Steelheart) to make the main point stand out. Make sure to use hand-lettered fonts sparingly, though. They can be difficult to read.

If you’re a newbie to fonts and designing images, I’d definitely recommend checking canva.com out. You can go to their social media images section and choose a Pinterest image that will already be the longer sized image that you need. They have many pre-made templates where you can drag and drop your own images into them. I also like using Canva for design research. I scroll through the images, taking note of what makes them “work.” Is it using white type on a dark background? Is it an interesting angle for the photograph they used? You can go on a reconnaissance mission of your own to see what styles you like.
As you’re creating your pins in Canva, remember to use the colors you chose at the beginning of this lesson. Also, choose two fonts that you will consistently use. You want people to see your pins and say, “Oh, it’s a pin from !” 🙂

By the way, although it’s great to come up with a strong branded look to your pins, these things take time, especially if you’re DIYing everything yourself. So be patient with yourself. And be brave. Try some styles out on for size and see what works. You’ll eventually find a template that works consistently for you.
If you’re struggling with the photography part of pinning, here is a comprehensive list of free stock photo sites.
The key to a viral pin is simple:
- It has to solve a problem so the title and/or description must be clear.
- The photography or layout has to be clear and meaningful. Your readers should want to click it to find out more.
It’s so “simple” and yet, it’s also difficult. It can be frustrating when you’re just starting out and trying to figure out what your audience wants and needs. There is definitely a trial and error period as you figure out your niche and what you want to write about.
One of the things I’ve done is create two or three different pins for the same page on my blog. Different people like different things, right? This has also helped me to see which images my audience responds to so I can make more of those.

This particular experiment for my Creative Retreat book was really interesting to me. I thought I would change from my typical pink theme to see if it made a difference. Looking at the number of repins definitely answered my question. Interestingly, the two pink toned pins had similar repin rates. Lesson learned! (Also notice there is no picture of the book, so that could have been a part of it too?)
Sometimes mixing things up helps you to discover you’re on the right track, and sometimes it introduces you to a whole new audience. So don’t be afraid to experiment!
I hope this Pin Like a Pro series has been helpful to you. I know when I was just starting out on Pinterest, it felt very overwhelming. As you experiment and try these tips out, you’ll begin to find your groove, I promise. You’ll also find that you’re becoming quite the graphic designer, which is awesome too!
Hope you have an amazing {and creative} day!
2 responses to “Pin Like a Pro—Create a Viral Pin”
I’ve been slowly experimenting with different pins. This last week, “advertised” my bleach spray shirt, but the repin rate has been very low … so I have to go back to the drawing board and figure out why. I experiment until a pin has hit the decks … or someone who likes it picks it up and repins it to their board. That strategy has been super effective for me.
I love that you’re experimenting, June! Promoting certain pins has been really helpful for me too. It can also be a great strategy for naturally earning affiliate sales!