The paint in this post was provided by DecoArt. However, this project idea and the opinions expressed are my own.
Before we dive into how to paint a dresser and really, what will probably end up being a list of Things I Learned While Painting This Dresser, let me tell you a bit about the background about this piece. At first glance, it probably just looks like a run-of-the-mill dresser. That’s what it looks like to you, but to me, it looks like a lifetime full of memories.
My grandpa made this dresser for my aunt when she was a little girl. I’m pretty sure he made two along with two twin beds. My sisters and I had the beds and this dresser when we were growing up. I literally remember standing on my tiptoes to reach the top (probably to get something my mom had put out of reach) which makes me realize, wow, that was a long time ago and I was really little.
That dresser has been the background for almost every move I’ve made in my life, besides college. It traveled with us from rental house to rental house. Then on to a brand new house and back to an older house. And then, when I came home after college, it came with me to my first apartment. I had the bed, the dresser and a futon for a couch. It was a pretty sparse apartment, but man, I was so happy.
Now all of these years later, this dresser stands in my daughter’s room. It’s filled with little shirts and sweaters and tights and pants, just like it used to be when I was young. And when my aunt was a little girl too.
It’s been painted many, many times in its life, and the last time I painted it, I sanded the old paint to make it smooth. Those were the days where I was renting a room in a huge house that overlooked the valley in Southern California. It was a DIYer’s dream: a huge back yard with endless sunny days. Needless to say, that project took me one day to do.
Insert a moment of silence for the days when I could do a project from start to finish in one day.
Anyway, I’ve been eyeing this dresser for the past several months (okay, years) and have really wanted to update it. It was looking very dingy and yet, I was concerned because I don’t have the time to do a big project. I also don’t have the space as we have a teeny deck for our “backyard” here at the apartment. Oh, and I live in Oregon, so the time to paint furniture that needs to dry outside is during the summer or else, rain.
I reached out to DecoArt as I’m part of their Blogger Outreach Program, and after a bit of research, discovered they have a Satin Enamel paint that doesn’t require sanding and is reasonably quick to dry. Sold. They graciously sent enough to paint the dresser and a couple other upcoming projects (stay tuned!), and I jumped for joy when they came.
Well, I would have jumped for joy except the day this paint arrived, it was pouring rain. Seriously?! Thankfully, the rain went away the next day (phew!), so I got to work.
Here’s the paint on the back deck. I seriously love this paint, but I’m getting ahead of myself.
How to Paint a Dresser (The Easy Way)

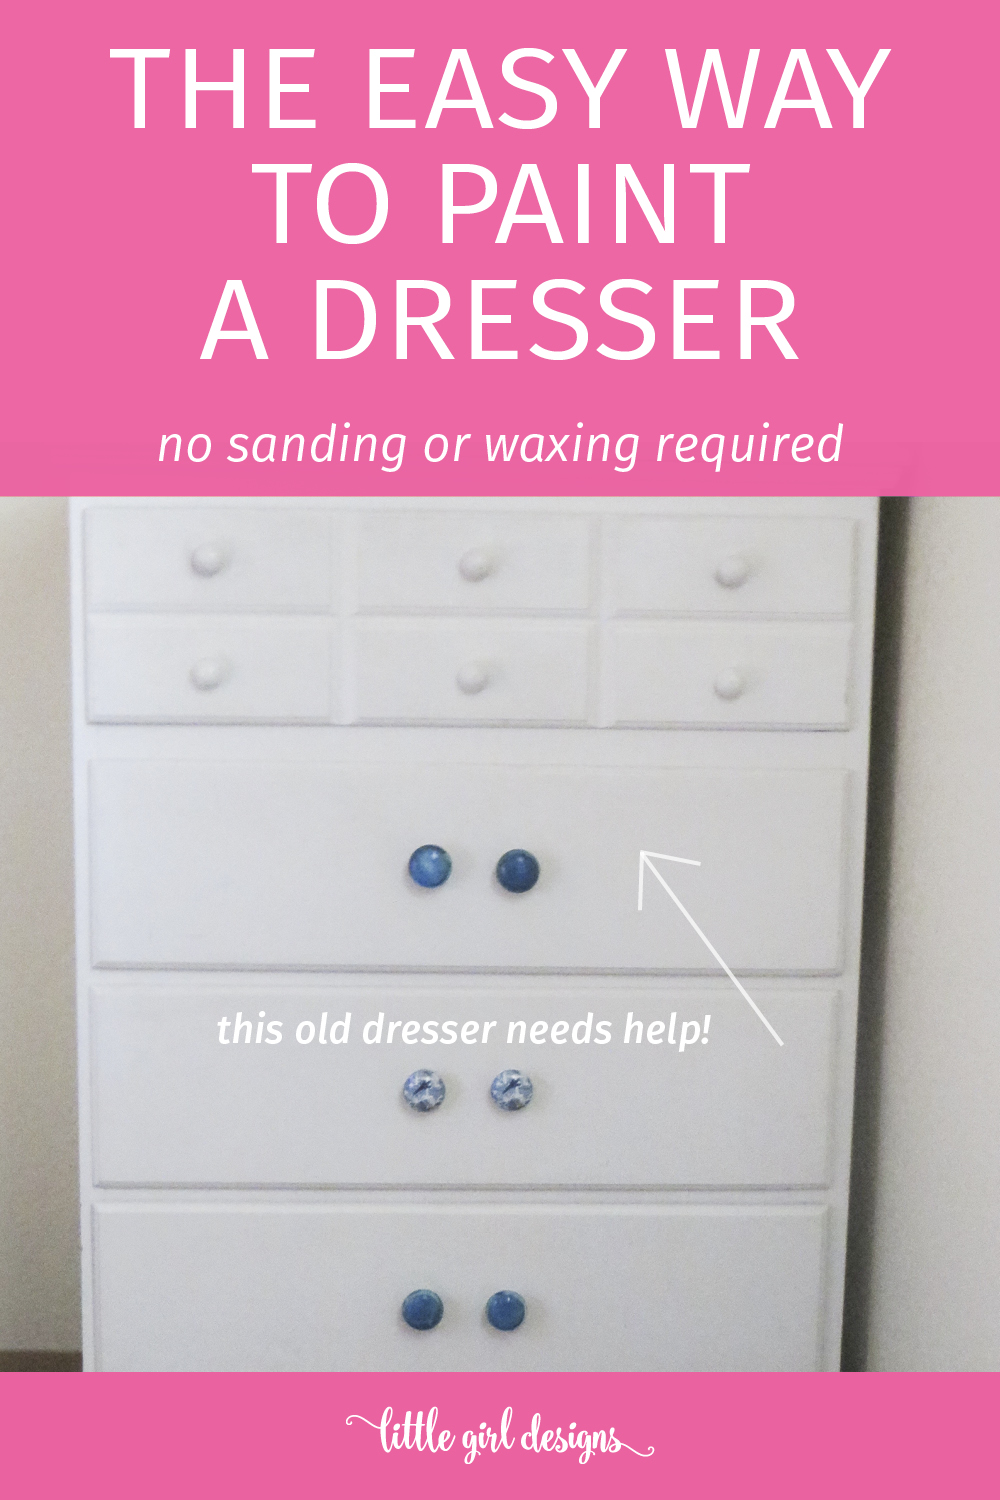
The picture below is the dresser prior to starting. As you can see, there were several scuffs along the top, but for the most part, it was really dirty looking. I scrubbed it with warm water and soap before taking this picture but it really didn’t make much of a difference. Poor old dresser! Still, I recommend that you clean whatever you’re painting so you don’t have to deal with dust or dirt.
To start, I took the clothes out of the dresser, and then took the top drawer to the deck. I removed the knobs from the bottom three drawers, but had a feeling (and was right) that I would only be able to do one drawer at a time.

Below is the top drawer, getting ready for the first coat of paint. And yes, that is a smiley face on the deck.
A couple things I learned right away about this paint:
It is fairly translucent, so I knew I would need a couple of coats of paint. Since the dresser was already painted white, I wasn’t too concerned about the paint being less opaque than I expected. My goal was for the new paint to freshen up the dresser and get rid of the dingy look.
It’s fine to go for it and add a lot of paint to your surface, but make sure you use long, even strokes to finish. Otherwise, those random paint marks will show.

Oh my goodness, can you see the difference already in the picture below? The paint goes on extra glossy but does dry into a nice satin finish, just like it said it would.
I let the paint dry overnight, and then I painted another coat.
One of the things I really liked about this paint was it doesn’t give off a lot of fumes because it is water-based. I’m really sensitive when it comes to smells, and often paint gives me a terrible headache. Thankfully, I was fine with this paint. Just a side note for those who are wondering if you’ll have to wear a mask for this kind of project.

I decided to be brave and paint a light turquoise for the top of the dresser to match the drawer pulls. I didn’t tape this off, but you could if you wanted to. The paint was easy to wipe away with a wet wipe if I made a mistake.
The whole dresser took two coats of paint. After painting the final coat, I let it dry overnight, and then moved it back into my daughter’s bedroom. It looks sooo nice!
Just a reminder to paint long, even strokes on surfaces like the top or sides of a dresser. It isn’t terrible if you don’t, but you’ll be able to see your strokes, at least with this paint.

Time to put the decorations back on top! I almost didn’t want to put anything on it because it was so smooth and nice. 🙂

The bottom of the dresser originally had a decorative wooden piece, but that has been missing for a long time. It’s been my bane since I don’t have a sewing machine at the moment or a workshop to cut something to size either.
My solution came from a piece of cloth I had in my craft supplies that I’ve been holding on to for a long time. It originally was from a pillowcase and was too pretty to throw away. I cut it to size and tacked it onto the dresser. I contemplated hot-gluing it (oh yes, I did) but the angle would have been a bit on the tricky side. Yay for using what I already had on hand! 🙂

One more shot of the top of the dresser. It is really glossy, and I LOVE it.

And finally, here’s the before and after shot. I’m so happy with how this project turned out, and now my daughter has a pretty dresser. I love how paint can completely update a piece.